Today was the last day of my week-long summer school in jewellery-making and metalsmithing, at the Leith School of Art here in Edinburgh. Typing is a bit sore thanks to the saw cut on my thumb (one of many!) but there are so many things to tell, I will persevere!
The course ran 9.30am-4.30pm Monday - Friday. We were a small group of 10 students, with a range of previous knowledge and ability - a real mix of people and backgrounds, which was nice.
A bit about Leith School of ArtEmbarrasingly enough I hadn't heard about this place until I was searching for a summer school to go on, back in the spring (even though I used to live in Leith!!). It's a
small art school, that runs evening classes, foundation courses, summer schools etc. The school is situated in an old church in Leith, and the building is great - lots of the original features have been kept, including the gothic arch doors and stained glass. There was a really nice atmosphere around the place, and it was busy with two other summer schools running concurrently to mine.
The course itself...Our tutor was
Jenny Deans, a local jeweller who trained at the
ECA and now teaches part time at the school. She was helped out by Jo, who is another jeweller and currently artist in residence at ECA. They were both young, enthusiastic, really knowledgable, and above all, patient! The atmosphere was really relaxed and informal, which was a really good environment to learn and try out new things.
The first day, Jenny took us through a lot of the basic tools and techniques. We learned about using saws, files, hammers, mallets, pliars, drills and punches, as well as the essential techniques of annealing (basically softening metal so it can be shaped and textured) and soldering.
I was really amazed at all the different skills needed to produce something that when finished looks quite simple - and also how physical the whole process is - from getting hot and sweaty with the blow torches for annealing and soldering, to sawing (including fingers!), to hammering (including thumbs!), to filing. It takes a lot of elbow grease, but as a result finishing a piece is really satisfying. For most of Monday we played around with ideas and tried out all the techniques.
By Tuesday, we began to think about the actual pieces we wanted to work on for the rest of the week. We were pretty much given free reign to do what we liked, within the constraints of the available equipment (and our limited ability!!), but that still left plenty of options.
I decided to focus on trying to find ways to mix textiles/threads and metal for my pieces. I wanted to find out how feasible it is, and to see whether this is something that has potential for me to explore further, either at home or in future classes.
We were given the choice of working in unlimited brass or copper, or limited amounts of silver (due to the expense). I decided to try out all three, but to leave silver until last so I could hopefully improve my skills before dealing with the expensive stuff.
Project 1 - Copper and kumihimo brooch
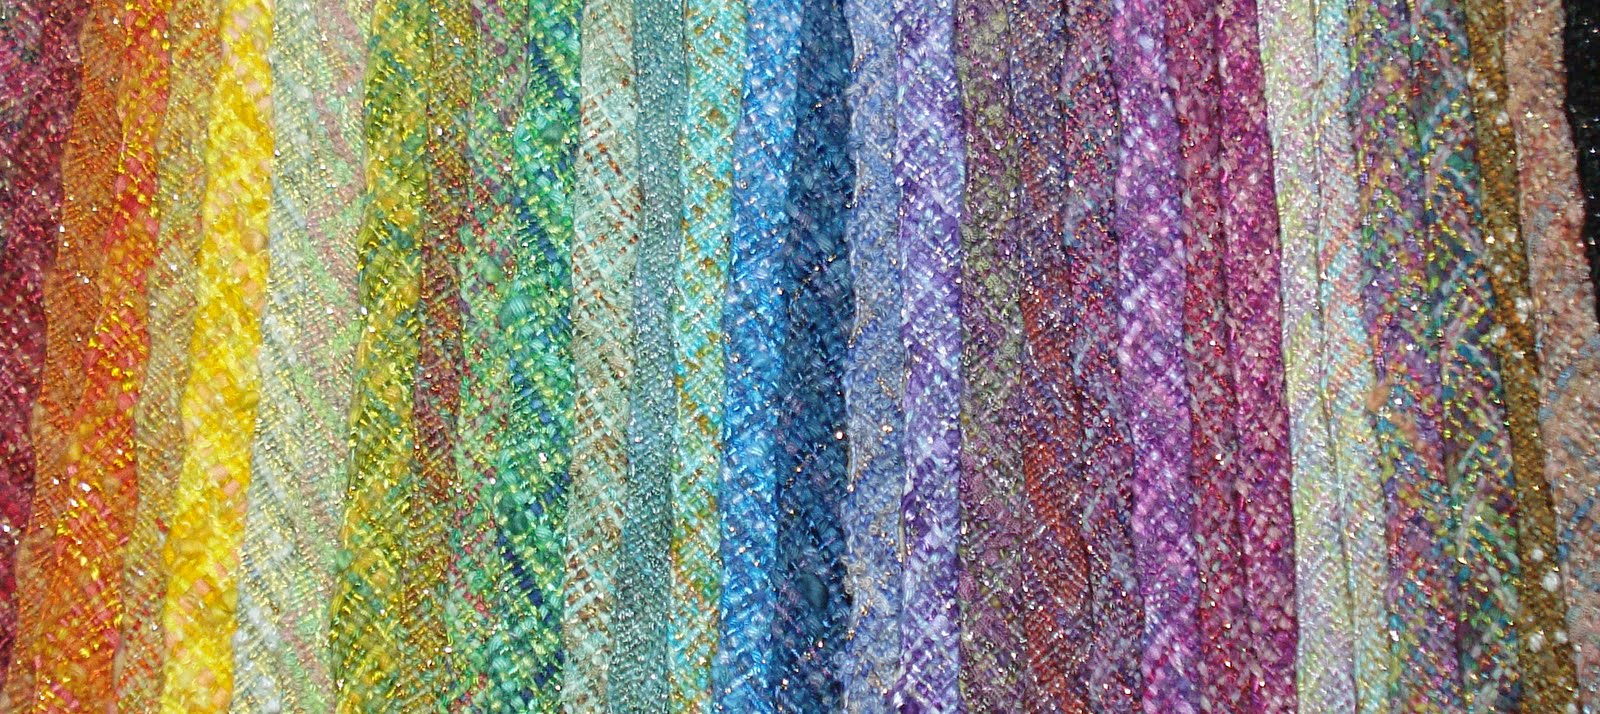
Before the course started, my main ideas had been to incorporate my kumihimo braids into a piece somehow. I wanted to show off the colours and textures of a braid against a very different background.
I really liked the colour of the copper metal we were given to work with, and thought that some of my braids worked in beautiful
Sassalynne copper/teal threads would work really well with the copper metal.
I decided to try a brooch piece, where I could experiment with different surface textures on the metal, as well as being able to incorporate 3 different braids, learn how to make a brooch finding, and practice cutting and filing circular pieces of metal (very difficult!). I experimented with a few different ideas before coming up with the final version.
I annealed 3 pieces of copper, and then sawed out 3 circles, each smaller than the last, using a metal compass to trace the shape. Then I hammered the metal to give it surface texture - each circle with a different hammer to give the specific texture. Then I cut out more

holes for the braids to be wound through. After that, the metal had to be annealed again, to soften it enough so that I could shape the circles into concave shapes. Once annealed and shaped, I hand drilled tiny holes in each disc so I could sew them all together. Then, finally, the last thing was to make and attach the brooch finding - essentially a needle and catch. This was by far the hardest thing I did all week (I found the soldering really difficult) and seemed amazingly complicated for something so ostensibly simple. With a lot of help from Jo, the assistant, we managed the difficult job of soldering onto a curved surface, and we shaped some stainless steel wire, which I filed to a point at the end, into the pin.
Once the hard bit was done, all that remained was to thread in the braids, and then sew the three discs together. It was a lot larger than I expected when it was finished, but I really like the colour combination and the different textures.
Project 2 - Felt and brass necklace
For my next piece, I wanted to incorporate something I had felted/beaded. I thought the simplest thing to start off with would be just to 'frame' the piece of felt in metal. I discussed it with Jo, who suggested sealing the frame with handmade rivets to hold everything in place. I decided to try working with brass this time - hard work!! Brass is much harder to saw than copper, and by this point my arms were getting really sore!

I cut a piece of felt I had made into a rectangular shape, and annealed, cut, and texture a brass back, and front 'frame' to sandwich it. The sandwich was sealed with handmade rivets of copper tubing in each of the for corners. The riveting was a really long process - 4 tiny 7mm lengths of copper tubing had to be annealed, then passed though tiny drilled holes in each of the corners. Then I had to open out the tubing with a scribe tool, to widen it and make the 'rivet' effect. I found this really difficult to do uniformly and delicately, so consequently the rivets in the finished piece were not quite as neat as I wanted! I hope this won't be so obvious when the piece is being worn though, as hopefully attention will mainly be drawn to the texture and colour of the felt.

After that, all that was left was to make jump rings to pass through the rivets, so that a chain could be attached (I didn't make the chain!!).
 Project 3 - various earrings
After I had finished the necklace, I still had some time to make a few pairs of earrings, and to try out working with silver. I had the idea of using threads in geometric or woven patterns, to give added colour and again texture. The silver was really nice and easy to work with compared to the brass. The most difficult part was making the earwires for the earrings - surprisingly hard to get two exactly the same (and I need a lot more practice!).


*-~-*
I was really pleased that, over the course of the week, I had the time and opportunity to try out working with all the different metals, and to try a bit of all the techniques Jenny showed us. I was really surprised by how physical all the work was, and at the end of every day we were all exhausted! Overall it was a really interesting experience. Although I think some of the techniques and equipment aren't really feasible for me to use at home (acid baths and blow torches with cheeky cats? I think not!), it has given me a taste for how felt and braids could be combined, so maybe I'll follow it up with an evening class to explore that further.

At the end of today's class, we had an exhibition, where our class, and the other two classes all showed our work to each other. It was really interesting to see how different each person's ideas and approach were - there were some really lovely pieces made by other people in the class. Unfortunately I forgot my camera (this slightly blurry picture was taken with my phone!), but Jenny and Jo took lots of photos - I'll post more of them here once I get them.